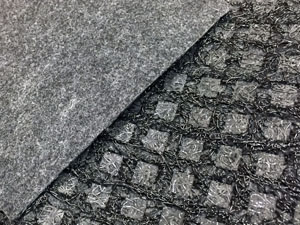
Concrete
Ensure all concrete is a minimum 28 days old, structurally sound, smooth, and stable prior to installing KeedeRoll® MT. Additionally ensure the slab meets TCNA requirements for the temperature/environmental requirements of the tile. All moving joints must be honored. Control joints must be honored or addressed prior to installation of KeedeRoll® MT. FloorPrep.com recommends consulting with a local engineer to determine suitability to fill and bridge control joints.
Gypsum Underlayment
KeedeRoll® MT serves as a TCNA approved barrier between tile and the gypsum underlayment. Ensure the gypsum is structurally sound, smooth, and stable prior to installing KeedeRoll® MT. It is recommended that you seal the gypsum underlayment prior to installing adhesive or mortar. FloorPrep.com’s Primer P360 will work as a suitable sealer. Reference the Primer P360 technical data sheet for installation instructions.
Surface Preparation
Concrete Floors/Gypsum Substrates
Ensure all substrates (Concrete/Gypsum Underlayment) are clean, dry, structurally sound, smooth, and stable.
Mechanically remove any dust, paint, oil, wax, or potential bond breakers from the substrate. Gypsum underlayments may require remediation to remove dusting. Consider FloorPrep. com’s PrepPro SLV to address severe dusting, damage or minor cracking of gypsum underlayments or Primer P360 to address light dusting.
All substrates must be smooth and flat with a maximum variance of 1/4” in 10’ (6 mm in 3 m) from the required plane per TCNA or TTMAC guidelines or as recommended by the tile or stone manufacturer (default to the most stringent requirement). If smoothing is required,it is recommended to install a self-leveling underlayment prior to installing KeedeRoll® MT. Reference FloorPrep.com for a wide variety of underlayments suitable for use over concrete, gypsum, wood or other that may become part of a greater “system warranty.”
Assure that the relative humidity of any concrete slab is in accordance with the finished floor’s tolerance level. Use ASTM F2170 Standard Test Method for determining RH in con- crete slabs to determine RH levels. If moisture remediation is required use FloorPrep.com’s Platform EMS. Test gypsum concrete for moisture content using a Delmhorst (G-79 or BD-2100 on Scale #3) moisture meter to determine if the gypsum slab is suitable for installation of ceramic tile. Consult Technical Services for suitable moisture levels in gypsum underlayments prior to installation, industry standards call for a residual moisture reading not to exceed 0.5 – 2.0% prior to installing uncoupling membranes.
Prior to installing KeedeRoll® MT, ensure any cracks existing in the substrate are “in plane”.
Wood
Only APA rated OSB & Plywood substrates are suitable for KeedeRoll® MT. Ensure the subfloor is structurally sound, stable, and built to code with movement joists placed in accordance with industry standards. General standards call for a deflection not to exceed L/360 for ceramic tile installations and L/720 for Natural Stone.
Minimum Thicknesses by Joist Spacing:
For a 16” OC joist, I-joist or floor truss a minimum subfloor thickness of 5/8” (16mm) is required with a minimum 1/8” tongue and groove gap between sheets.
For a 19.2” OC joist, I-joist, or floor truss a minimum subfloor thickness of 3/4” (19mm) is required with a minimum 1/8” tongue and groove gap between sheets.
For a 24” OC joist, I-joist or floor truss a double layer of plywood with one layer being at least ¾” (19mm) and an added layer of 3/8” (10mm) subfloor is required. A minimum of 1/8” tongue and groove gap between sheets is also required. If a second layer of plywood is un desirable, a layer of FloorPrep.com’s Skimflow LCB at 3/8” minimum thickness may be used as an alternate.
Materials Recommendations
All materials must be delivered to the job site in original containers with all of manufacturer’s labeling intact. No modifications are allowed.
Gypsum Sealer
GSL Sealer, MultiFamily TopCoat/Sealer, Primer P360, Primer MF, or equivalent sealer
Wood Adhesives
Mapei ECO 980, Parabond 4010, Bostick Best, DriTac7700, or equivalent adhesive
Carpet Adhesives
Mapei ECO 373, Taylor Dynamic, DriTac5900, or equivalent adhesive
Vinyl Adhesives
Mapei ECO 360, Taylor Resolute, DriTac 5900, or equivalent adhesive
Mortar Adhesives/Thinsets Under/Over KeedeRoll® MT
KeedeSet Pro, KeedeSet Flex, Ultraflex 1, Versabond, or any ANSI A118.11 approved mortar
Perimeter Isolation Strips
Keene Building Products’ Quiet Qurl® Perimeter Isolation with Quik Stick
Application Instructions
Following the steps properly while installing KeedeRoll® MT is essential to the success of your installation.
KeedeRoll® MT may be bonded to the substrate with a wide variety of mortars or adhesives. Follow the mortar and/or adhesive manufacturer’s instructions for mixing and application.
When installing to realize the full benefit of sound attenuation properties, utilize perimeter isolation strips around the room perimeter.
Place isolation strips if required.
PrePosition and precut your KeedeRoll® MT to cover your substrate. Place the KeedeRoll® MT so that subfloor control joints are at least 3” from the long edge of any roll of KeedeRoll® MT. Align the end and edges of KeedeRoll® MT and ensure all the seams (sides & ends) are butted tightly together.
Starting from the wall and using the appropriate thin-set mortar or adhesive, begin troweling out the mortar/adhesive; MORTARS: USE 1/4” x 3/16” V-Notch trowel.
ADHESIVES: 1/16” x 1/16” x 1/16” V-Notch trowel. Only trowel out enough mortar/adhesive that can be covered with KeedeRoll® MT within the allowable working time of mortar/adhesive.
Place KeedeRoll MT into the mortar/adhesive with the fabric side down. Lift up a corner to ensure there is full coverage of mortar/adhesive on the fabric – if not, adjust application to ensure full mortar/adhesive coverage.
Use a weighted roller to ensure the fabric is embedded into the mortar/adhesive. Roll the KeedeRoll until all air pockets are eliminated.
Align the end and edges of KeedeRoll® MT and ensure the seams are butted tightly together.
Once the mortar or adhesive bonding the KeedeRoll® MT to the substrate has dried, proceed with tile installation. Follow thinset mortar manufacturer installation recommendations.
Installing Tile Over Keederoll® MT
All tile must be installed according to the tile manufacturers’ instructions.
Tile may be installed over KeedeRoll® MT as soon as it has been embedded into place.
Trowel the appropriate mortar using the recommended size trowel to key in mortar into the KeedeRoll® MT mat.
Ensure the mortar has filled the entangled net and is encased into the filaments.
Spread the tile manufacturers’ recommended mortar thickness onto KeedeRoll® MT, then embed the tiles into the setting material. Periodically lift the tile to ensure the tile has appropriate cover age.